How To Create a Unity 2D Project
In this article you will learn how to install create a Unity 2D PRoject using UnityHub 2.3.2 in order to start developing 2D games.
Requirements
To follow this Unity tutorial you will need to:
New Unity Project
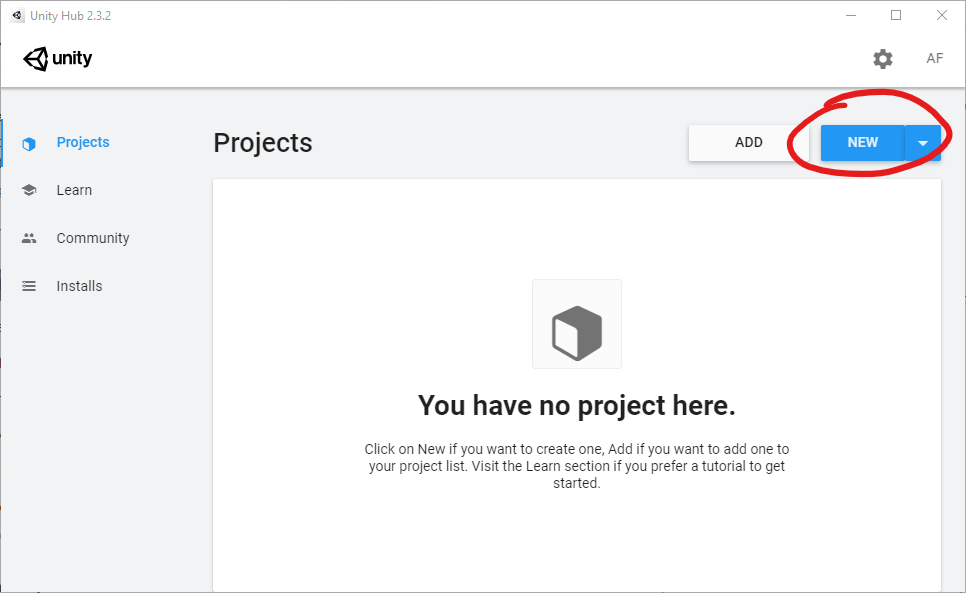
To start a new Unity 2D project, open UnityHub, go to Projects section and then click on the NEW button:

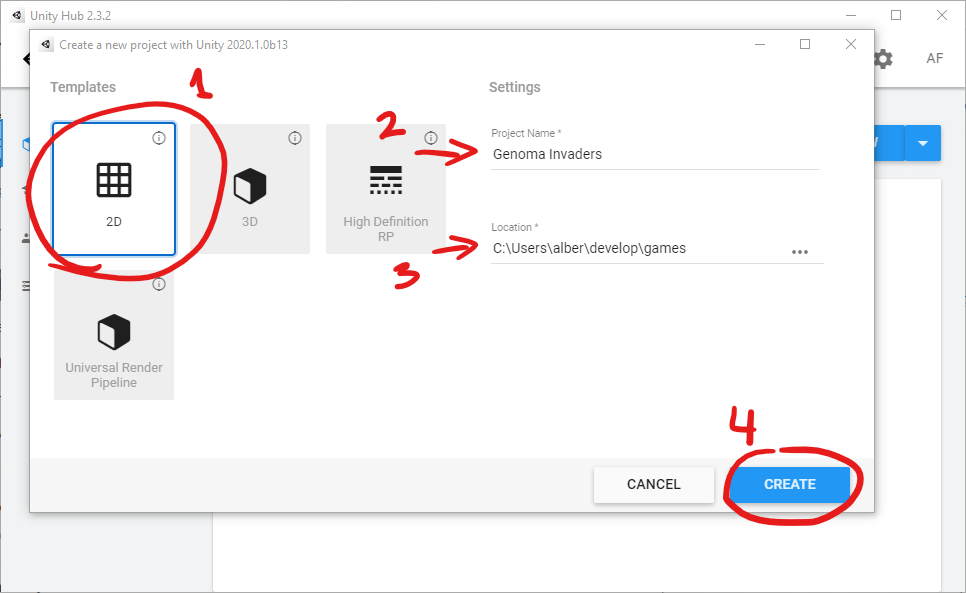
UnityHub will show up the new project form with multiple Project Templates to choose.
Project Templates provide preselected settings based on common best practices for different types of Projects. These settings are optimized for 2D and 3D Projects across the full range of platforms that Unity supports.
2D Template Configures Project settings for 2D apps, including Texture (Image) Import, Sprite Packer, Scene View, Lighting, and Orthographic Camera packages
Choose the 2D Project Template. You will need to provide a Project Name (This value will also be used as the directory name containing the project) and a Location to your file system to where the project will be created. In this example we are setting this values to Genoma Invaders and C:\Users\alber\develop\games, next you just need to press the CREATE button.

This will create a new directory, in this example C:\Users\alber\develop\games\Genoma Invaders, containing all the project files.
Genoma Invaders
├── Assets
│   └── Scenes
│       └── SampleScene.unity
├── Library
├── Logs
├── Packages
├── ProjectSettings
└── UserSettings
Note: Some files and folders have been omitted from the file tree to favor readability.
UnityHub will open the project with Unity:
_blank_2D_project.png)
That will be all, you are ready to start working in your New Unity 2D Project.
Checkout Unity 2020.1 Manual "Starting Unity" Chapter for more info.
Happy Game Dev! 👾
Post this